Showing posts with label Circle Circus. Show all posts

Friday, July 22, 2011

Loads of Friends

I have always loved the stamp set Loads of Love, it's cute, quirky and has heaps of different applications, I've used it for everything from wedding cards to birthday, moving house, thank you's it's one of those stamp sets that is just perennial and fun! I did a custom class this week with the directive of making cards that are gender neutral, not age specific or event specific until you add the greeting. This way you can have a stash of cards on hand and when you need one, you stamp a greeting, pop it on and within 2 minutes you have your card ready to go. Saves a lot of time and angst. For my sample cards I added a greeting and in this case decided to add a female driver, but for my stash I would leave off the greeting and person until I knew what event or person I was making it for.


Stuck for ideas or have a specific event or requirement for a card? Or just want to build up your card stash? Check my calendar of events to join in a class or if you have some friends who all want to make some cards together I will happily come to you and do a custom class, contact me now to organise a date.

Stamps: Loads of Love, Loads of Love Accessories & Circle Circus
Ink: Crumb Cake, Black Stazon, Real Red
Card Stock: Crumb Cake, Woodland Walk DSP, Real Red, Water colour paper, Whisper White
Accessories: 1/4" Real Red grosgrain ribbon, Scallop border punch, Dimensionals, 1 1/4" circle punch, stamping sponge

Sunday, March 20, 2011

Summer Fun Progressive Scrap Page

How do you turn a stamper into a scrapbooker? Very slowly is the answer! Big spaces to fill is very daunting for a lot of papercrafters - but here's a nice gentle way to ease people into the process. It's a progressive scrap page - first off you make a 6"x6" page and decorate it (incorporating a photo - which I'll eventually add) which really is just a bit bigger and squarer than a normal card......


I used circles and layers and jazzed it up a bit with sponging, embossing folder and Dimensionals. Then I took this 6"x6" page and popped it onto an A4 page and added a few more elements to get this:


I continued the circle theme down the page to link it together and then added two more photo mats. This whole page was then layered up onto a 12"x12" page and ohh my goodness a square card has just turned into a scrapbook page!


The circles continued down the page and off to the right a bit as well, then I added a layered Top Note die for journaling. The So Saffron 12"x12" page was looking a bit bland so I jazzed it up a bit with stamping some circles from the stamp set in the same colour and then sponged all the edges as well. So what do you think of the result? 

Stamps: Circle Circus
Ink: Tangerine Tango, So Saffron, Baja Breeze
Card Stock: Tangerine Tango, So Saffron, Baja Breeze, Whisper White
Accessories: Dimensionals, Timeless Type alphabet, Big Shot, 1" circle punch, 1 1/4" circle punch, 1 3/8" circle punch, Simple Letters alphabet, Top Note die, Polka Dots Textured Impressions Folder, Stamping Sponge, SNAIL, Tombow glue, Jumbo roller wheel & Spot On.

Saturday, September 18, 2010

ESAD Blog Hop - Snorkelling Scrap Pages & Butterfly Writing Set

Okay so who isn't loving everything in the new Stampin' Up! catalogue? If you have just joined the blog hop or have come here from the super talented Susan Joyce I hope that you are enjoying some terrific ideas for how to use those Big Shot dies! So get a cuppa and enjoy the journey as I hope you’re ready for the ESAD Big Shot Blog Hop!

What is ESAD?
ESAD stands for Extra Special Australasian Demonstrators and it is an online group just for Australian and New Zealand demonstrators for Stampin’ Up! We so love what we do and not only do we love to share it with our customers, friends, and wonderful blog visitors but we share our love for what we do with each other as Demonstrators. We run swaps, challenges, tutorials, product know how and cyberstamps and we are always there to help and support each other when its needed.
So if you are a Stampin’ Up! Demonstrator located in Australia or New Zealand then please feel free to click here to join our wonderful group.

I have created two different projects for this blog hop, the first is a scrap page layout using the Circles #2, Timeless Type Junior Alphabet  & Top Note dies for the super versatile Big Shot & the second is a writing compendium using the Beautiful Wings Embosslit and the Elegant lines textured impressions embossing folder.


I took inspiration for this layout from the new Celebrations DSP and extended the circle theme across the pages using the Circles #2 die, the Top Note die photos I hand cut off the perforated edge of the die to create a border around each photo. I also stamped a few of the bashful blue circles with a stamp from Circle Circus to continue the theme of the DSP.
  

Stamps: Circle Circus
Ink: Real Red
Paper: Celebrations DSP, Real Red, Bashful Blue, Pacific Point, Pear Pizzazz DSP from DSP  ( level 1 hostess).
Accessories: Big Shot, Circles #2, Timeless Type Junior Alphabet,Top Note, Circle Scissors, SNAIL, Paper snips, Stampin' write journaler, 2-Way glue pen, 

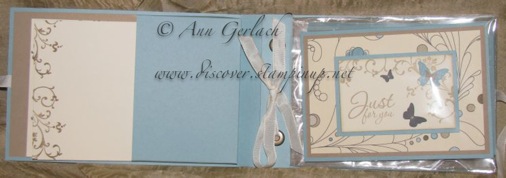
The second project is a writing compendium based on a design by Andrea Walford that I originally made in June and have remade using products from the new catalogue. It is a lovely gift as it is a compendium that holds 4 cards and envelopes all on the same theme. I chose to use the new elegant lines embossing folder which is so gorgeous and the new Elegant Soirée DSP with the new Beautiful Wings embosslits which is such awesome value - I totally love it.


Wouldn't this make the most wonderful gift? I also used the new basic pearls to embellish the cards. It's hard to see with my photography, but the embossing is so deep, it's just gorgeous and when you emboss on plain white or vanilla card stock and sponge over the top, the design pops out and looks fantastic. 


This is what the inside of it looks like:


Here's a close up of one of the cards as well - how terrific is it that Crumb Cake (kraft) is now available in an ink pad!


Stamps: Elements of Style, Afterthoughts (level 1 hostess)
Ink: Soft Suede, Basic Gray, Crumb Cake, Baja Breeze
Card Stock:Very Vanilla, Baja Breeze, Crumb Cake, Soft Suede, Basic Gray, Elegant Soirée DSP
Accessories: Paper piercer, Stampin' Dimensionals. Very Vanilla taffeta ribbon, 1" circle punch, 1 1/4" circle punch, Stamping sponges, SNAIL, Scallop edge punch, Crop-o-dile, Jumbo eyelets pewter, Sticky Strip, Basic Pearls.

Anyway congratulations for getting this far through my post! If you have any questions or comments please feel free to contact me and I will try to help out, I do have scrapbook, card and gift set classes like the above running regularly, for a calendar of events, please check my website. The next blog to hop on over to is that of Dani Fender  and you are going to love what she has made! 

Saturday, August 14, 2010

Hot Air Balloon

When I first got the stamp sets that were suitable to use with the sweet treat cups I went nuts making cards & 3D items with them and always incorporating the sweet treat cup - which is fine and a lot of fun, but I sort of forgot that they are terrific to use without the treat cups as well *LOL* I made a card recently with the A Little Treat stamp set (it made some lovely 3D flowers with jelly bean centres for Mothers Day too!) but this time I went for a hot air balloon look. If you are wondering why it is so pink - it was for an 8yo girly girls birthday (hence pink & glitter on the centre flower circle).


Stamps: Circle Circus & A Little Treat
Card stock: Chocolate Chip, Whisper White & Pretty in Pink
Inks: Pretty in Pink & Chocolate Chip (ink pad & marker pen)
Accessories: Aqua Pen, Scallop edge punch, 1 3/4" circle punch, Pretty in Pink 1/4" grosgrain ribbon, Dazzling Diamonds glitter, 2-way glue pen, SNAIL.