Sunday, January 30, 2011

Love Daisies?

Well I decided I wanted to use some of my new toys and join in the latest Inkspiration sketch challenge. I don't normally make square cards as it's hard to get them to fit into envelopes, but the Whisper White medium Square Envelopes (#107289) are perfect for them. 


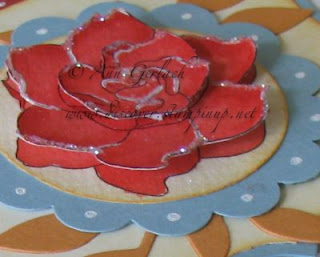
I bought the 2 3/8" scallop circle punch from the Summer Mini and layered it with the 1 3/4" scallop circle punch. Snipped in each petal, but not all the way to the centre, sponged the edges and then secured them together with one of the lovely Antique Brads - like the result?


The sentiment was stamped in Basic Black, cut out and layered on top of the same image stamped in Riding Hood Red with a Dimensional and embellished with a Basic Rhinestone.


The faux ribbon is actually just card stock that has been wet with a few spritzes of Stamp 'n Mist, then just scrunched up, when it dries it holds it's shape and becomes quite hard. I sponged the edges of it to add a bit more colour depth and then stuck it onto the card - too easy!


Stamps: Cute by the Inch (hostess level 2)
Ink: Basic Black & Riding Hood Red
Card Stock: Very Vanilla, Basic Black & Riding Hood Red
Accessories: Basic Rhinestones, 1 3/4" scallop circle punch, 2 3/8" scallop circle punch, Stampin' sponges, SNAIL, paper snips, Antique Brad, Dimensionals.

Thursday, January 27, 2011

Lets Use Up Scraps Of Rubber!

So what do you do with all of the scraps of rubber that come with your Stampin' Up! stamp sets? 


Do you:
1. bin them
2. hoard them away as ONE day they might be useful
3. use them as Dimensionals (take the paper & rubber off and the gray foam makes a great Dimensional)
4. make them into new rubber stamps.........

Well this is what we did at a party workshop recently - used up scraps of rubber & card stock (but that's a different blog post!). My wonderful husband used up some scrap wood in his workshop and made me some wooden blocks for mounting the rubber onto and I cut up my scrap rubber and made these:


Pretty cool hey! Ohh and if the rubber won't stick on one side due to it either coming from a clear mount stamp set or just being stored for way too long - adhere it down with the awesomely versatile and strong Crystal Effects - it's definitely more than just a paper lacquer! IPersonal experience does lead me to comment that I don't use normal scissors for this or it will be a labour of love - the Stampin Up! craft & rubber scissors really do make life easier as they cut rubber like butter.

You will never get the crisp precision details of a commercial stamp, but you can make some terrific background stamps (also a wonderful school holiday activity for children - just be careful of the scissors!). Now these are NOT for hoarding either - the fun is to do something with them. Here's one quick idea I did:


How cute is that giraffe - this one is from the new hostess set It's The Thought from the Summer Mini, but it would also look fantastic with the giraffe from Animal Stories.


Stamps: It's The Thought & handmade background stamp
Ink: More Mustard, Early Expresso
Card Stock: More Mustard, Early Expresso & Whisper White
Accessories: Early Expresso 1/4" grosgrain ribbon, sponges, Aqua painter, SNAIL, corner rounder punch.

I'd love to see what you make with scrap rubber - or better still what other uses you have for it, leave me a comment and let me know. Of course if you would like to learn a technique or get ideas around a theme, why not get together with a couple of friends and book your own workshop and I'd be happy to come and show you some different ideas!

Monday, January 24, 2011

Sale-A-Bration Commences


From today, 25th of January 2011, until Thursday 31st of March there are three easy ways to earn your choice of FREE stamp sets!

-[ SPEND ]-
Spend A$100 and Earn a  
FREE Sale-a-Bration Set of your choice.

-[ HOST ]-
 Host a workshop of at least A$600 and you'll earn a  
FREE Sale-a-Bration set in addition to 
the generous hostess benefits. 

-[ JOIN ]-
Join Stampin' Up! during Sale-a-Bration and 
choose a FREE Stemp set** from the Idea Book and 
Catalogue (valued up to A$79.95)

To have a look at the stamp sets click here or there is a link on my website or on my blog sidebar (top right). To book a workshop and earn FREE stamp sets or join my Stampin' Up! team contact me now!

Summer Mini Scrapbook CASE

The Summer Mini catalogue is in full swing and Sale-a-bration starts tomorrow (happy dance) if you want to book a workshop for it, please contact me. I have also been working on a new 3D valentines tutorial from the Paper Crafters Library, but I got sidetracked recently as a lot of people I know saw page 11 of the Summer mini went "Ohh I want to make that". 


(don't ask about the red lettering at the top of the page - I know there is an easy way to covert a PDF to a jpg so I can upload it to my blog, but I only know the hard way of doing it and that results in red writing on the image - any computer literate readers I'd love some tips!!). Anyway I set about making a double scrapbook layout based on the above page. The first challenge of course was that the Presto Patterns Specialty paper used in the catalogue wasn't suitable firstly as I wanted a left and right page and that 'Paris' image is only on one half of the Presto paper and also in a class situation for everyone to have the same papers would mean that everyone would have to purchase a pack of the Presto Patterns Specialty paper in addition to the class cost. Answer - make our own paper using clear embossing powder, Versamark and the stamp set Friends 24-7 (thanks for the loan Charmaine - my order arrived today!). The result is below:


The pages have a lot of sponging on them as well as the new smooch sprays to add a vintage feel to them. 


Details of paper tearing and piercing to add a distressed look and layering to give it all depth and the rhinestones, well what can I say - they add style and sparkle at a very low cost!


The pages use lots of lovely Big Shot dies to make the flowers and lettering, some of the flowers I put through the textured impressions embossing folder to give even more dimension to them and other flowers were just stamped on with the Elements Of Style set, which was also used a watermark in the background of the pages.


So the left hand scrap page looks like this completed:


Obviously it will change a bit when I add photographs to it, but at the moment I was really pleased with the way the pages turned out.


This class is running on March the first if you want to come along and make your own set of pages with me (full details of my classes can be found on my website here) or if that time/day doesn't suit you can get together a minimum of four paper crafters and I will bring everything to you. 

Does this answer the question as to why Stampin' Up! call their catalogue an Idea Book & Catalogue?? Hopefully it has inspired you to have a second look at some of the pages and CASE some of the ideas within them.I'd love to see any creations you have CASEd using the Ideas Book & Catalogue!

Sunday, January 23, 2011

Sweetheart Heart Flowers

We made two similar cards at a recent class using the Sweetheart stamp set to make heart flower cards. The first used a punch overlay of textured card stock and the second was stamped directly onto the card stock. I love how the full heart punch co-ordinates perfectly with this stamp set.


I loved the effect the textured card stock via the Bid Shot textured impressions lattice folder (summer mini catalogue) gives this card, popped up on Dimensionals. The bitty heart button is also very cute! I tied a knot through it with linen thread and adhered the button knot side down with Crystal Effects (awesome as a glue as well as a clear lacquer). The leaves and stem of the flower were stamped in Versamark and hand cut to give more dimension as well.


Stamp Set: Sweetheart
Ink: So Saffron, Versamark, Basic Black
Card Stock: Crumb Cake, Not Quite Navy, Riding Hood red, Very Vanilla
Accessories: Dimensionals, Big Shot, Lattice textured Impressions plate, paper snips, SNAIL, white gel pen, full heart punch, mat pack & paper piercer, scallop border punch.

The next card was very similar - all the same elements, just arranged differently. This time the textured card stock was part of the base and the heart was stamped directly into rather than adding a punched out heart.


Stamp Set: Sweetheart
Ink: So Saffron, Old Olive, Not Quite Navy
Card Stock: Crumb Cake, Not Quite Navy, Riding Hood red, Very Vanilla
Accessories: Dimensionals, Big Shot, Polka Dot textured Impressions plate, paper snips, SNAIL, mat pack & paper piercer, Stamp-a-ma-jig, scallop border punch.

I'll post the other cards we made in this class soon.........if you want to check out what classes I have coming up you can go to my website and view the calendar of events or subscribe to my monthly newsletter. Of course if you can't make the class dates, I'd be happy to come and run the class to suit you for a minimum of 4 participants just give me a call or email.

Thursday, January 20, 2011

Children's Christmas Class

I promise I'm almost at the end of my Christmas items! I keep finding "just one more" that I haven't blogged! These were two items made at children's Christmas class, where I had some delightfully well mannered girls for a morning of creative fun. The first item was a double milk carton holder & yes, before you ask, the cartons did contain treats!


The one's the girls made had a lot more glitter on it than I put on mine and were secured at the top using tiny clips e.g. mini library clips, rather than punching the holes and fastening with string (faster way for them to access the treats!). Each side of the milk carton had a different image on it and all of the edges were sponged to add the "extra" finishing touch to them.


Stamps: Christmas Classics & Forest Friends
Ink: Chocolate Chip, Old Olive, Real Red
Card Stock: Jolly Holiday DSP, Real Red, Whisper White & Old Olive.
Accessories: Crop-a-dile, Dazzling Diamonds glitter, 2 way glue pen, SNAIL, Big Shot, Lots of Tags die, hemp twine, mini library clips, 1 1/4 circle punch.

The second project for the morning was another treat holder - this time a hanging snowman ornament. Very cute and refillable, with a  tab on the back hidden by this hat! What I don't think you can see from my photography is that there is a hole at the top of his hat to tread a gold cord through to enable hanging it from the Christmas tree. It held approximately half a pack of standard size Tic Tac's, but you could use mini marshmallows or other small white lollies (sweets/candy).


Card Stock: Basic Black, Real Red, Whisper White, Pumpkin Pie & Old Olive.
Accessories: Crop-a-dile, Dazzling Diamonds glitter (on holly berries), 2 way glue pen, SNAIL, 1 1/4 circle punch, 1 3/4 circle punch, treat cup, 2 step Bird Punch, Word Window Punch, Small Tag Punch.


January Big Shot Offer


Santa didn’t bring you what you wanted? How this for a cool offer (for Australian residents/shipping addresses only):

Order the Big Shot Die-Cutting Machine (includes standard cutting pads and multipurpose platform) $179.95 
(normal postage & handling fees applicable) and as a bonus I’ll give you your choice of a FREE textured impressions embossing folder RRP$15.95, plus as the order would be over $100 you are also eligible to chose for FREE one of the four simply stunning Sale-a-bration sets of your choice in either wood or clear mount (RRP $31.95 wood or clear mount RRP $24.95) and you can pay for it over 3 months*.

Of course if you added an extra $20.05 of merchandise to your order you would be eligible for not one, but 2 FREE Sale-a-bration sets so for a $200 spend on merchandise including the Big Shot, you would also get a free textured impressions plate and two Sale-a-bration stamp sets all of your choice giving you a saving of $79.85 off RRP of products!

* If you wish to take up a 3 month payment plan – the first payment would be in January and goods delivered after the last payment in March with 1/3 paid each month.

If you are wondering what it will cut check out my blog post here from last year - there are over 50 materials listed! It is one of the most well used tools for paper crafting I own and was worth every cent I paid for mine!

Contact me today to take up this offer, as first payments are due by the end of January!

Tuesday, January 18, 2011

Children's Birthday Class

Well I had a lot of fun a fortnight ago, I got to do a special birthday class for six 9 & 10 year old girls who just love to craft! We made three items using one stamp set, three ink colours and some punches - kept them happy and entertained for 1.5-2 hours.


I did the die cutting before hand and the girls got to chose which embossing folder they liked and put it through the Big Shot themselves. The first item we made was a Top Note bag, similar to the ones we made at our World Card Making Event here. You can't see from the angle of the photograph, but there is a second punched pink butterfly beneath the stamped one to give it more dimension, only the central body of the butterfly was glued down so that the wings could stay up to give more dimension. The largest of the Boho flowers was also popped up on dimensionals to give more dimension. Each of the girls got a little wood mount stamp to pop in their bags to take home.

The second project was a matching card and envelope - I should say that although these were the samples I made up, the girls took their own initiative and made them up to suit themselves. Some decorated with the hearts not the butterflies or birds and they all chose different textured backgrounds, or sentiments, some chose to pop things up on dimensionals and others not - although everyone loved using the basic pearls!


They were really good about sponging their projects to add that extra depth and layering up the punched out pieces. Some used different coloured leaves or flipped the ribbon to use the plain pink side rather than the polka dot. The last project involved lollies (candy/sweets) so of course was popular! It was also the simplest of them all as it is a Top Note die cut piece of designer paper folded in half and embellished before being attached to a small cello bag filled with treats!


Stamps: Punch Potpourri, On Your Birthday
Ink: Regal Rose, Tempting Turquoise, Chocolate Chip
Card Stock: Pink Flamingo DSP (retired), Whisper White, Chocolate Chip, Regal Rose, Tempting Turquoise
Accessories: Chocolate Chip double stitched grosgrain ribbon (retired), Melon Mambo polka dot grosgrain ribbon (retired), small cello bags, Two-step bird punch, butterfly punch, Boho Blossom punch, full heart punch, two way glue pen, SNAIL, basic pearls, large oval punch, stamping sponges, Dimensionals, Big Shot, Polka dot textured impressions die.
Non SU: gold paper bag 


Saturday, January 15, 2011

Beach Scrapbook Pages

Well summer is well and truly here and this weeks scrapbook class made a gorgeous double page layout perfect for putting in their summer beach photos. I saw a nice beach layout here and used that for my inspiration, the photos are from a few years ago - I'm a tad behind with my own scrap booking, but we won't go into that! Not everyone has a boy, so we also had alternative punch elements to add for the girls involving a bit more glitter and pink!


I always do my classes as double layouts as I feel it looks nicer when they go into an album. These pages used a lot of sponging, rolling with the new Sandy Speckles wheel and lots of punch art! The crabs were CASEd from Teresa G. and Michelle H. and look so cute, especially as where these photos were taken was by the river where we do get lots of blue swimmer crabs.


I added the red spider crab though just because he was SO cute!


For those who didn't want to do crabs, we also had a glittery mermaid, a pair of thongs (flip flops for the northern hemisphere readers) and a beach ball. Some of the girls got carried away and added a shell bikini to their mermaids from the small Boho blossom flower, but I left mine plain.


I always use a terrific product called Dotto for piecing together my layouts before I stick them together permanently, such a great product, saves lots of frustration later on when you just want to move something that little bit, but can't as it's stuck down!  I couldn't decide when I was putting together this layout which colour letters to use for the title, eventually I did a shadow layer and liked the result - what do you think?


A close up of the first page is here, the shells were stamped in the darker soft suede ink and sponged with crumb cake as when I stamped them in the crumb cake ink, they just sort of disappeared and didn't pop out like I wanted them too.


The matching page also has plenty of space for photos and journaling.


Stamps: Nature's Nest, Elements of Style
Ink: Crumb Cake, Soft Suede
Card Stock: Bashful Blue, Crumb Cake, Pacific Point, Daffodil Yellow, Whisper White, Chocolate Chip & Basic Black
Accessories: Hemp Twine, Wide oval punch, large oval punch, small oval punch, two-step owl punch, photo corner punch, small tag punch, crop-a-dile, SNAIL, two-way glue pen, Big Shot, Junior Timeless Type alphabet, spiral punch, Sandy Speckles roller wheel.

I saw another gorgeous summer scrap book layout on "Water Play" at the Paper Crafters Library so might have to make up another layout soon using some of the many swimming at the beach photos I have taken and done nothing with! So if you are like me and have way too many photos that you have not done anything with, feel free to come along to our monthly scrapbook class or get some friends together and I can bring the class to you. Details of all my classes are either on my website and while you are there you can sign up for my monthly newsletter, so then you don't miss out on all the Stampin' Up! news and ideas.

Australia Flood Appeal


image from Geelong Advertiser


Over the last few weeks Australia and the world has watched the incredible devastation that has occurred and is still occurring as the state of Queensland due to flooding. As flood waters continue to inundate Australia in what has been described as the worst flooding in 37 years, we express our deepest sympathies to those who have lost loved ones and homes and to those whose lives have been changed forever. Stampin' Up!, like so many of you, feel a compelling need to lend support to all those who have been affected.

Stampin' Up! demonstrators have a long history of making a difference in the lives of others--especially when disaster strikes and the need is greatest. Nearly two years ago, we watched another tragedy unfold in Australia. Our hearts were touched as demonstrators, customers and friends joined together in support of the Bushfire Appeal. We've done it before and we can certainly do it again!

Please join with us by supporting the Australia Flood Appeal--a cause in which Stampin' Up! will donate $2 AUD of the retail value of sales from any stamp set (with a retail value of $30 or more) sold in Australia and New Zealand from 15 January through 15 February to the State Emergency Services in Queensland.


Contact me now to place an order or host a party - don't forget orders over $100 before shipping and handling from the 25th of January are also eligible for FREE Sale-a-bration stamp sets.

Thursday, January 13, 2011

Inkspiration Colour Challenge #52

Well I am loving the new Paper Crafter's Library, it only launched this week, but I got this lovely box tutorial & template from it and had a nice time making it up (I didn't use the stamp sets or designer paper that they did as I don't own them - but it is easy enough to adapt things). I also combined it with a colour challenge set down by the Inkspirations crew which was to use the following:


It is actually a "sweet set" colour suggestion from the Stampin' Up! Color Coach so even though I wasn't thrilled with the colours, I knew they would work well together! Here is the result:


A nice box with a flip top magnetic lid that would be perfect for popping a gift into. The Paper Crafters Library video tutorial (38 minutes of it for one project so it's like an online class) even covered for beginners how to water colour and sponge. 


The white gel pen dots really add something nice to the box don't they? I am also loving the new 2 3/8" scallop circle punch. 


I painted three of the flowers in total from the Growing Green stamp set onto water colour paper, added white gel pen highlights and then punched the bottom one out in a circle and layered the next two up with Dimensionals before adding yet more highlights with Crystal Effects and Dazzling Diamonds glitter.


Stamps: Growing Green, Just Believe
Ink: Peach Parfait, Basic Black, Baja Breeze
Card Stock: Riding Hood Red, Baja Breeze, Peach Parfait, Water color paper, Hostess Level 1 Designer Series paper pack - In Color
Accessories: Big Shot, Little Leaves Die, Top Note Die, white gel pen, Stampin' Sponges, 2 2/8" scallop circle punch, 1 3/4" circle punch, Dimensionals, Crystal Effects, Dazzling Diamonds glitter, SNAIL, sticky strip.

Don't forget to check out the Inkspirations blog to see what other wonderfully talented people came up with for this colour combination!


Wednesday, January 12, 2011

Paper Crafters Library


I just found a wonderful new resource for Paper Crafters launched by the awesomely talented Andrew Walford, it's for all level of stamping experience from newbies to experienced crafters to demonstrators, but I think isolated crafters or ones that benefit from more visual and in depth instruction will really love it. There is a permanent link on the side of my blog, but you can also click here and it will take you to the site. She is offering a special charter membership rate until the end of this month. If you want to see the type of instructional videos she makes, you can check out a vast array of free ones she has done on You Tube to see some of her work. Anyway let me know what you think!

Monday, January 10, 2011

Baby Steps Congratulations

Well two more friends had babies in the last month and this was one of the congratulations cards I made for their arrival. I love the a la carte stamp range and who doesn't love elephants??? Following the flip/swing card I made last month I used the same template to whip up this card.......


What you can't see from my photo is that I re-stamped the Elephant ears on scrap white card stock and made them into little 3D ears that can flap to give it even more dimension. The reverse of the elephant was done similar to the previous card with a balloon aqua painted.

Stamps: Crazy For Cupcakes & Baby Steps
Ink: Bashful Blue & Chocolate Chip.
Card stock: Whisper White, Bashful Blue & Chocolate Chip
Accessories: SNAIL, stamping sponges, aqua painter brush

Wednesday, January 5, 2011

Super Owl

Okay so I think I'm obsessed with the new punches.........but the owl is so cute & versatile - I saw one similar to this on a blog, but now I can't find it to credit it! This is the card I made a few months ago for my DH birthday and just found it whilst cleaning up and thought I'd show you another version of the owl......but this time as a superhero! The background of clouds was done with a scallop circle used as a mask for randomly sponging.


Stamps: Look Who's Turning
Ink: Pacific Point
Card Stock: Real Red, Pacific Point, Daffodil Yellow, Whisper White & Crumb Cake
Accessories: Real Red brads (Brights collection), Dimensionals, 2-way glue pen, paper snips, Scallop circle punch, 1/16" circle punch handheld, large oval punch.

Tuesday, January 4, 2011

Christmas Tag

Even though I make lots of Christmas cards through the year in classes and for swaps for some reason I didn't send many this year - opps! I made larger gift tags though so they were a sort of pseudo card  - does that count? I mainly used Christmas Contempo as I love that set and it's such a bargain at just AUD$26.95 ($21.95 for CM), I also love that the ornament punch co-ordinates perfectly & make sit easy to pop up the ornament on Dimensionals!


Stamps: Christmas Contempo & Delightful Decorations
Ink: Basic Black, Real Red
Card stock: Real Red, Daffodil Yellow, Old Olive & Whisper White
Accessories: Basic rhinestones, 1/16" handheld punch, SNAIL, ornament punch, Dimensionals.
Non SU: gold cord

Monday, January 3, 2011

Itty Bitty Christmas Tree

I am absolutely loving the new Itty Bitty stamps, buttons and punches in the summer mini catalogue. Here is a card I made for a Christmas swap last month. It also featured the new lattice embossing folder and the square scallop Big Shot dies. The Itty Bitty set is awesome for using up scraps and the results - well to me it definitely doesn't look like scraps destined for the bin!


Stamps: Itty Bitty Bits
Ink: Riding Hood Red & Old Olive
Card Stock: Old Olive, Daffodil Yellow, Chocolate Chip, Riding Hood Red & Whisper White
Accessories: Big Shot, Scallop Square Die, Square Lattice embossing folder, Itty Bitty Shapes, 2-way glue pen, paper snips, scallop trim punch

Sunday, January 2, 2011

Santa Treat Tubes

Well here's yet another quick Christmas project using the owl punch - again! I think I need to move onto something different as I seem to be a bit obsessed with him of late & the skinny treat bags which were perfect for the M&Ms! These were so cute and I made several as little give aways with other gifts at Christmas - the things I assemble whilst watching my sons sporting activities!


I was naughty as the scallop circle behind the owl was from some retired card stock - did I tell you I was cleaning up of late?? but Old Olive or Pear Pizazz would also look awesome! Here's a little close up of him so you can see how he was put together.


Card stock: Garden Green (retired), Real Red, Whisper White, Basic Black & Crumb Cake
Accessories: White gel pen, paper snips, 2 way glue pen or Tombow, Owl punch, Scallop circle punch, two-step bird punch (hat), word window punch (hat).

Saturday, January 1, 2011

Free Sweet Treat Cups!!!!


From now until 24 January, when you purchase either the Sweetheart stamp set (your choice of wood or clear mount) or the Full Heart Punch, you will score a FREE pack of Heart Treat Cups valued at $6.50! For even more fun, purchase the stamp set AND the punch, and you’ll get TWO FREE packs of Treat Cups!
ItemPageDescriptionPrice
12157638Sweetheart Wood-Mount Set$38.95
12078038Sweetheart Clear-Mount Set$29.95
119883146Full Heart Punch$33.95

The Heart Treat Cups are an adorable  addition to any card, or as the central feature of any project e.g. flower centre, the bonus being that you can put all manner of cute things inside! I'll be posting some cards made with them over the next few days. The treat cups can be filled with small lollies (sweets/candy), buttons, punched shapes, glitter, you can put a rub-on or stamped image beneath it – the possibilities are endless!
To order some treats for YOUR sweets, send me an email today or sign up for my monthly newsletter for all the latest news!

Christmas Movie Gift Bag

Ever stuck for what to get some people as a gift? I don't like giving clutter and trust me children get given a lot of stuff which is either clutter or will break in 3 minutes! So for two lovely young girls we gave them a movie pack - consisting of a voucher for their tickets and also a bag containing popcorn and a bag of jelly snakes to enjoy whilst at the movies - some summer holiday fun! This of course would be suitable for any occasion, age or gender.


Pretty cool hey? And it also saves on gift wrapping as the decorated bag has it all - how awesome is that spiral punch! The gift card was held securely in a separate tag pouch that I tied on with ribbon.............fast, effective and well received.


Stamps: Punch Pals
Ink: Basic Black, Real Red, Peach Parfait, Old Olive
Card Stock: Real Red, Basic Black, Whisper White
Accessories: Spiral punch, aqua painter brush, SNAIL
Non SU: Brown paper bag with handles & ribbon