Showing posts with label Challenge. Show all posts

Sunday, January 22, 2012

Cheerful Treat Array of Sunshine

Goodness we really are in the middle of summer with such hot weather of late, I did make some time this week to take part in another challenge over at Craft Project Central and thought I'd combine their sketch challenge with a personal challenge/desire of using some stamps & papers that are new and I haven't made time to play with yet!

The sketch was this one.....


I'm not entirely sure if it was their use of pink on the sketch or what set my brain off, but this was my card:


I took the colours for the layout from the hostess DSP Cheerful Treat and the two stamp sets I used are also exclusive hostess ones (I am so loving the new hostess rewards - the choice is awesome). It took some fussy cutting and layering with Dimensionals to create more interest with the flowers and a bit of shine from the basic pearls didn't hurt either. I do apologise that the Melon Mambo ribbon I chose is now retired, but you could easily substitute it with the Melon Mambo scallop dots ribbon for a very similar effect and to be honest the scallop ribbon would probably suit this card better than what I have used!


Stamps: Array of Sunshine, Happiest Birthday Wishes
Card Stock: Concord Crush, Cheerful Treat, Whisper White, Melon Mambo, Pink Pirouette.
Ink: Melon Mambo, Concord Crush.
Accessories: Basic pearls, Polka Dot Melon Mambo grosgrain ribbon, Dimensionals


Monday, July 11, 2011

CPC1 Summer Solstice

I was fortunate enough to earn this stamp set, Summer Solstice, for FREE at the Australasian annual Stampin' Up! convention this year, it's one of the new ones that will be in our 2011-2012 Idea Book and Catalogue to be released on the 1st of September. When I saw the challenge to make a pretty card using the sketch on Craft Project Central I knew I wanted to use this set!


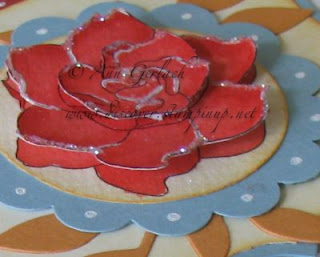
I stamped the butterflies directly onto the Marina Mist card stock, then again on the So Saffron, cut them and stuck them on top of the other ones to give more dimension to the card. The same for the flower, I stamped it twice onto the card stock, but one whole flower out, then cut the other into all the petals and flower centre, and stuck all the pieces back together using Dimensionals (you can see the white foam of the Dimensional on the photo below holding the flower centre up). I added the Crystal Effects to the flower centre and butterfly bodies to add another dimension to the card and the same for the paper piercing.


Stamps: Summer Solstice
Ink: Basic Black & Cherry Cobbler
Card stock: So Saffron, Cherry Cobbler, Marina Mist, Old Olive
Accessories: Scallop border punch, Crystal Effects, Stamp-a-ma-jig, paper piercer, mat pack, Dimensionals

Sunday, July 10, 2011

Motorbike & Extreme Guitar JAI Colour Challenge

Just Add Ink (JAI) had a cool colour challenge this week and I made two quick cards for it. I have been known to spend +4 hours on one card, so I am trying to practise making cards that take me under 10 minutes otherwise I'll never get cards made to send to people! The colours were:

which screamed masculine to me - but check out the other entries as they are far from masculine! The first I made was using a cool stamp from the current mini catalogue called simply Motorbike....


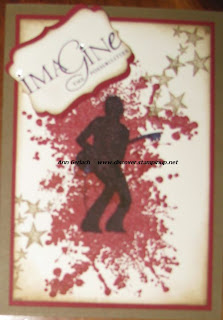
The second was done using the same layout and additional stamp sets, but featuring the single stamp Extreme Guitar.


Stamps: Motorbike, Extreme Guitar, Extreme Elements, Word Play
Ink: Basic Black, Cherry Cobbler & Soft Suede
Card Stock: Very Vanilla, Cherry Cobbler, Soft Suede
Accessories: Stamping Sponges, Basic Rhinestones, Decorative Label punch, Dimensionals, Aquapainter & water colour crayons.

Tuesday, May 31, 2011

Growing Green - JAI Challenge

I saw a cool challenge this week over on the Just Add Ink website and thought I'd join in the fun! I am loving the water colour crayons being back in stock and have been playing with the gorgeous stamp set Growing Green of late so everything sort of got combined into this........the photography isn't the best as it's night time so no natural light and my husband normally watermarks stuff for me, but he's away so the creating side of this card was a lot of fun - the technical bits to get it onto the web are all a bit challenging!


You can't quite tell from the photo, but each flower is water coloured and cut as are all the leaves and then everything was repositioned and glued into place with Tombow or Dimensionals. The centre white circle is cut with the Circle Scissors Plus, sponged along the edges and layered onto the Baja Breeze scallop circle, before being added to the card using Dimensionals. The white backing piece has the tulip embossing folder frame added to it - irregular shape, but with a bit of patience and a Big Shot machine, it can be made to fit any rectangle or square shape - pretty versatile hey! 


The main sentiment came from the stamp set Afterthoughts which is a level one hostess set. I also had to embellish the envelope to match with a little masking just to make the postal workers day!

Stamps: Growing Green, Afterthoughts (hostess level 1)
Ink: Baja Breeze, Stazon Black,
Card Stock: Whisper White, Baja Breeze, Water Colour paper
Accessories: Aquapainter, Water Colour Crayons, paper snips, Dimensionals, Tombow, Big Shot, Circle Scissors, Scallop Circle Die, Tulip Textured Impressions Folder, stamping sponge.

Thursday, May 26, 2011

Monochrome Green

I recently participated in a challenge to make a card using only one colour.........easer said than done as I was really stumped, then I started flicking through the Ideas Book & Catalogue and a card on page 9 caught my eye!  Here is my CASE of it done in nothing but greens (well except for the basic rhinestones and vanilla stripes on the ribbon!)


Stamps: On Your Birthday
Ink: Always Artichoke
Card Stock: Woodland Walk DSP, Wild Wasabi, Certainly Celery, Garden Green
Accessories: Curly label punch, 1 1/4" circle punch, 1 3/8" circle punch, Bitty punch, Scallop Trim Border  punch, Blossom Party Die, Big SHot, Basic Rhinestones, Dimensionals, Certainly Celery Striped Grosgrain Ribbon, Linen Thread, Subtles Designer Buttons. 

Thursday, January 13, 2011

Inkspiration Colour Challenge #52

Well I am loving the new Paper Crafter's Library, it only launched this week, but I got this lovely box tutorial & template from it and had a nice time making it up (I didn't use the stamp sets or designer paper that they did as I don't own them - but it is easy enough to adapt things). I also combined it with a colour challenge set down by the Inkspirations crew which was to use the following:


It is actually a "sweet set" colour suggestion from the Stampin' Up! Color Coach so even though I wasn't thrilled with the colours, I knew they would work well together! Here is the result:


A nice box with a flip top magnetic lid that would be perfect for popping a gift into. The Paper Crafters Library video tutorial (38 minutes of it for one project so it's like an online class) even covered for beginners how to water colour and sponge. 


The white gel pen dots really add something nice to the box don't they? I am also loving the new 2 3/8" scallop circle punch. 


I painted three of the flowers in total from the Growing Green stamp set onto water colour paper, added white gel pen highlights and then punched the bottom one out in a circle and layered the next two up with Dimensionals before adding yet more highlights with Crystal Effects and Dazzling Diamonds glitter.


Stamps: Growing Green, Just Believe
Ink: Peach Parfait, Basic Black, Baja Breeze
Card Stock: Riding Hood Red, Baja Breeze, Peach Parfait, Water color paper, Hostess Level 1 Designer Series paper pack - In Color
Accessories: Big Shot, Little Leaves Die, Top Note Die, white gel pen, Stampin' Sponges, 2 2/8" scallop circle punch, 1 3/4" circle punch, Dimensionals, Crystal Effects, Dazzling Diamonds glitter, SNAIL, sticky strip.

Don't forget to check out the Inkspirations blog to see what other wonderfully talented people came up with for this colour combination!


Thursday, August 12, 2010

Treat Tube Challenge from Kim Score


I love to visit blogs of really talented stamping artists and I love punch art, I don't do that much of it, but I really admire some of the awesome work that can be created using punched shapes. Well this week one such artist issued a challenge to turn her gingerbread treat tube holder into our own personal design using the base instructions for the tube. So here is my end result:


Pretty damn cool hey!!! Even if I do say so myself. I confess to the idea of making a cannon barrel as not entirely being my own - I made up the tube in scrap card stock and was holding it and musing on it as you do and DH came to see what I was up to and we entered into one of those what could you make with this conversations (some bizarre and funny suggestions were bandied about, but then we settled on making a cannon). Thanks to Google I managed to get some half decent pictures of what a cannon should look like and I went from there. I actually extended the tube from the base design to be 5" by 5" in size as the original tube was a bit short for a cannon barrel. The carriage is cut entirely from one piece and the wood effect was done with a marker pen and sponge (I am so waiting for the new woodgrain stamp to be released in Australia in about 2 weeks time!).  I even went shopping for gob stoppers to be the cannon balls, but apparently they don't sell them in our supermarket and I had to settle for chocolate orange balls instead. The good thing is that you can fill the entire barrel with the chocolate orange balls and it doesn't tip over as the designer brads counterweight it nicely!


Card stock: Soft suede, brushed silver, basic black.
Ink: Chocolate chip pad & marker
Accessories: Star designer brads, 1 3/8" circle punch, 1" circle punch, vintage black brads, 1/16" handheld hole punch, 3/4" hold punch, fancy flower extra large punch, Sticky Strip, Stampin' Dimensionals, Stampin' Sponge.

Of course whilst taking photos of the cannon to upload to my blog, DH raided our sons Lego Duplo box and added a few extra props...........


Too funny - loved the challenge & the original idea that Kim had for the treat tube, thanks for visiting!