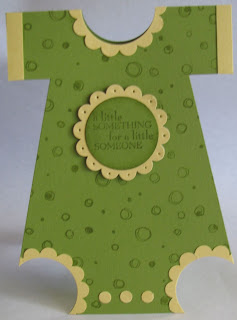
A close up of the centre piece - it's textured by using a paper piercer to go around the scallop circle. The circle piece is sponged with Old Olive ink and then the layered piece is raised up with Stampin' Dimensionals to give the card more interest.
I remade it reversing the colours - but instead of going over the base cardstock with a jumbo roller wheel, I scored it uniformly to form lines - it made a nice textured piece of cardstock which I thought gave it a different look to just stamping over the card.
I had planned to make a third version using designer series paper on the front - so it would then give me three different looks for one card style - but I've been time anemic due to school holidays. Once I had sorted out the positioning of the punches to get the legs right, the rest of the card was easy. For sticking on these little bits like the scallop trim I tend to find the Tombow multi purpose adhesive to be really good, although it takes a minute or so to dry.
Stamps: Best Yet (hostess level 1) & See You Around Jumbo wheel (for first card)
Cardstock: Old Olive & So Saffron
Ink: Old Olive
Accessories: 1 3/8" circle punch, scallop circle, single hole punch (non SU), paper piercer, mat pack, Stampin' Dimensionals, Tombow multi purpose adhesive, scoring blade on Fiskers cutter, Stampin' sponge.


No comments:
Post a Comment